
The Beauty of Elfin Thyme Seeds
Elfin thyme, also known as Thymus serpyllum ‘Elfin’, is a charming and versatile herb that is popular among gardeners for its low-growing, spreading habit and delightful fragrance. This perennial herb is native to Europe and is prized for its ornamental value as well as its culinary and medicinal uses.
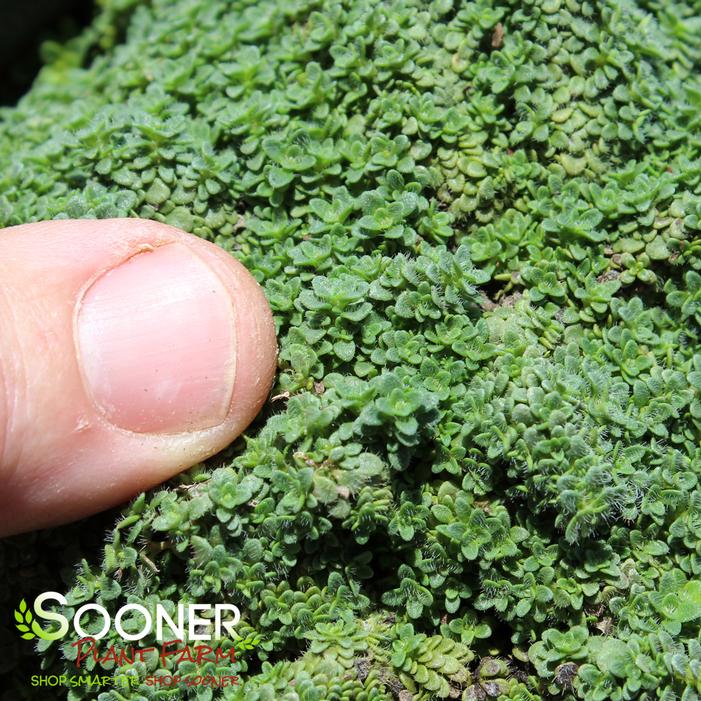
One of the easiest ways to grow elfin thyme is from seeds. Elfin thyme seeds are tiny but mighty, capable of producing lush green foliage that forms a dense mat perfect for ground cover or edging in garden beds. These seeds are easy to sow and require minimal maintenance once established.
When planting elfin thyme seeds, it’s important to choose a well-draining soil mix and provide ample sunlight for optimal growth. Sow the seeds thinly on the surface of the soil and gently press them down to ensure good seed-to-soil contact. Keep the soil consistently moist but not waterlogged until the seeds germinate.
As elfin thyme grows, it will develop small pink or purple flowers that attract pollinators like bees and butterflies to your garden. The aromatic foliage can be harvested for culinary purposes, adding a savory flavor to dishes like roasted meats, soups, and salads.
Aside from its culinary uses, elfin thyme is also valued for its medicinal properties. It has been used in traditional medicine to treat various ailments such as coughs, sore throats, and digestive issues. The essential oils found in elfin thyme have antimicrobial and antioxidant properties that contribute to its health benefits.
In conclusion, growing elfin thyme from seeds is a rewarding experience that allows you to enjoy the beauty and benefits of this versatile herb. Whether you’re looking to enhance your garden with a fragrant ground cover or add a flavorful twist to your cooking, elfin thyme is sure to delight both your senses and your palate.
9 Essential Tips for Successfully Growing Elfin Thyme from Seed
- Sow elfin thyme seeds indoors 6-8 weeks before the last frost date in your area.
- Use a well-draining potting mix when planting elfin thyme seeds.
- Keep the soil consistently moist but not waterlogged during germination.
- Place the planted seeds in a warm location with indirect sunlight for best results.
- Thin out seedlings to prevent overcrowding once they have grown a few inches tall.
- Transplant seedlings outdoors after the danger of frost has passed.
- Space elfin thyme plants about 6-12 inches apart in the garden or container.
- Water newly transplanted seedlings regularly until they establish roots in their new location.
- Harvest elfin thyme leaves as needed for culinary purposes, ensuring to leave some foliage for continued growth.
Sow elfin thyme seeds indoors 6-8 weeks before the last frost date in your area.
To ensure a successful start for your elfin thyme seeds, it is recommended to sow them indoors 6-8 weeks before the last frost date in your area. This early indoor sowing allows the seeds to germinate and establish strong roots before being transplanted outdoors once the threat of frost has passed. By starting the seeds indoors, you can give your elfin thyme plants a head start and promote healthy growth, leading to a bountiful harvest and vibrant garden display.
Use a well-draining potting mix when planting elfin thyme seeds.
When planting elfin thyme seeds, it is crucial to use a well-draining potting mix. This ensures that excess water can easily drain away, preventing the seeds from becoming waterlogged and promoting healthy seed germination and growth. A well-draining potting mix provides the right balance of moisture retention and aeration, creating optimal conditions for the elfin thyme seeds to establish strong roots and thrive. By choosing the right potting mix, you set the foundation for successful growth and development of your elfin thyme plants.
Keep the soil consistently moist but not waterlogged during germination.
To ensure successful germination of elfin thyme seeds, it is crucial to maintain a delicate balance in soil moisture levels. Keeping the soil consistently moist but not waterlogged is essential for supporting the initial stages of growth. By providing adequate hydration without saturating the soil, you create an optimal environment for the seeds to sprout and establish healthy roots. This careful approach to watering during germination sets the foundation for robust growth and development of your elfin thyme plants.
Place the planted seeds in a warm location with indirect sunlight for best results.
For optimal germination and growth of elfin thyme seeds, it is recommended to place the planted seeds in a warm location with indirect sunlight. This gentle exposure to light and warmth creates an ideal environment for the seeds to sprout and thrive. By providing the right conditions, you can ensure that your elfin thyme seeds have the best chance of developing into healthy plants with lush foliage and vibrant flowers.
Thin out seedlings to prevent overcrowding once they have grown a few inches tall.
To ensure healthy growth and optimal development of elfin thyme seedlings, it is essential to thin them out once they have reached a few inches in height. Thinning out the seedlings helps prevent overcrowding, allowing the remaining plants to have ample space, sunlight, and nutrients to thrive. By removing excess seedlings, you not only promote better air circulation and reduce the risk of disease but also encourage stronger root systems and fuller foliage in the remaining plants. This simple practice of thinning out seedlings is a proactive step towards cultivating robust and flourishing elfin thyme plants in your garden.
Transplant seedlings outdoors after the danger of frost has passed.
To ensure the successful growth of elfin thyme seedlings, it is advisable to transplant them outdoors once the threat of frost has subsided. By waiting until after the last frost date in your region, you can protect the delicate young plants from potential damage and give them the best chance to thrive in their new outdoor environment. This timing allows the seedlings to acclimate to the outdoor conditions gradually, ensuring a smooth transition and promoting healthy growth for your elfin thyme plants.
Space elfin thyme plants about 6-12 inches apart in the garden or container.
When planting elfin thyme seeds, it is recommended to space the resulting plants about 6-12 inches apart in the garden or container. This spacing allows the plants to have enough room to spread and grow into a lush mat of foliage, creating a beautiful ground cover or edging. Proper spacing also ensures that each plant receives adequate sunlight, water, and nutrients for healthy development. By giving elfin thyme plants room to thrive, you can enjoy a vibrant and aromatic display in your garden or container.
Water newly transplanted seedlings regularly until they establish roots in their new location.
It is essential to water newly transplanted elfin thyme seedlings regularly to help them establish roots in their new location. Adequate watering is crucial during this initial period to support the seedlings as they acclimate to their surroundings and develop a strong root system. By providing consistent moisture, you can ensure the successful growth and survival of the transplanted seedlings, setting them up for healthy development and thriving in their new environment.
Harvest elfin thyme leaves as needed for culinary purposes, ensuring to leave some foliage for continued growth.
To make the most of your elfin thyme plant for culinary delights, remember to harvest the leaves as needed while being mindful to leave some foliage intact for ongoing growth. By selectively picking the leaves for cooking, you can enjoy the fresh and aromatic flavors of elfin thyme in your dishes while allowing the plant to continue thriving and producing new growth. This practice ensures a sustainable supply of flavorful herb for your culinary adventures, maintaining a healthy balance between harvesting and nurturing your elfin thyme plant.