
Garden Supplies: Essential Tools for Every Gardener
Having a well-stocked arsenal of garden supplies is crucial for any gardening enthusiast. Whether you are a seasoned green thumb or just starting out, having the right tools and equipment can make all the difference in your gardening success. From basic essentials to specialized items, here are some must-have garden supplies that should be in every gardener’s shed.
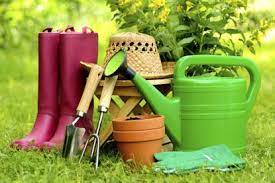
- Hand Tools: A set of quality hand tools is a gardener’s best friend. These include a sturdy trowel for digging and planting, a hand cultivator for loosening soil, and a weeder for removing pesky weeds. Look for tools with comfortable handles and durable construction to ensure they can withstand the demands of regular use.
- Pruning Tools: Pruning is an essential task in maintaining healthy plants. Invest in a pair of sharp pruning shears for trimming small branches and stems, as well as a pruning saw for larger branches. Additionally, having a pair of bypass loppers can come in handy when dealing with thicker branches.
- Watering Equipment: Proper watering is vital to the health of your plants. A watering can or hose with an adjustable nozzle allows you to control the flow and distribution of water accurately. Consider investing in a soaker hose or drip irrigation system for more efficient watering, especially in larger gardens.
- Garden Gloves: Protecting your hands while working in the garden is essential. Opt for gloves that fit well, provide good grip, and offer protection against thorns, prickly plants, or harmful chemicals found in fertilizers or pesticides.
- Soil Amendments: Good soil is the foundation for healthy plant growth. Depending on your specific needs, consider having organic compost, peat moss, vermiculite, perlite, or other soil amendments on hand to improve soil structure and fertility.
- Fertilizers and Pest Control: Keep a selection of fertilizers and pest control products suitable for your specific plants and garden needs. Organic options are available for those who prefer environmentally friendly solutions.
- Plant Supports: As your plants grow, they may need support to prevent bending or breaking. Stakes, trellises, or cages can provide the necessary support for climbing plants, tomatoes, or other heavy-fruited varieties.
- Mulch: Mulching is an effective way to conserve moisture, suppress weeds, and regulate soil temperature. Keep a supply of organic mulch such as wood chips, straw, or shredded leaves to apply around your plants when needed.
- Seed Starting Supplies: If you enjoy starting your plants from seeds, invest in seed trays or pots, seed-starting mix, and a small greenhouse or grow lights to provide optimal conditions for germination and early growth.
- Storage and Organization: Lastly, don’t forget about storage solutions to keep your garden supplies organized and protected from the elements. Shelving units, tool racks, or a dedicated shed can help maintain order and ensure that everything is readily accessible when needed.
Remember that investing in quality garden supplies will save you time and frustration in the long run. Take care of your tools by cleaning them after each use and storing them properly to prolong their lifespan.
Whether you have a small container garden or an expansive backyard oasis, having the right garden supplies will make your gardening experience more enjoyable and rewarding. So gear up with these essential tools and get ready to create a beautiful outdoor space that will flourish under your care!
9 Essential FAQs on Garden Supplies: Tools, Soil Amendments, Watering, Fertilizers, Pest Control, Plant Supports, Mulching, Seed Starting, and Storage Tips
- What are the essential garden tools every gardener should have?
- How do I choose the right type of soil amendments for my garden?
- What is the best way to water plants effectively and efficiently?
- Which types of fertilizers should I use for different plants or gardening methods?
- How can I protect my plants from pests and diseases without using harmful chemicals?
- What are the different types of plant supports available, and which ones should I use for specific plants?
- When and how should I apply mulch in my garden?
- What are some tips for starting seeds indoors successfully?
- How can I properly store and organize my garden supplies to keep them in good condition?
What are the essential garden tools every gardener should have?
Every gardener, whether a beginner or an experienced enthusiast, should have a set of essential garden tools to ensure smooth and successful gardening. Here are some must-have tools that every gardener should consider having:
- Hand Trowel: A hand trowel is a versatile tool for digging small holes, transplanting seedlings, and removing weeds. Look for one with a sturdy metal blade and a comfortable handle.
- Pruning Shears: Pruning shears, also known as secateurs or hand pruners, are essential for trimming and shaping plants. They are perfect for cutting small branches, deadheading flowers, and maintaining the overall health of your plants.
- Garden Fork: A garden fork is useful for breaking up compacted soil, turning compost piles, and aerating the ground. It helps improve soil structure and allows better water penetration.
- Garden Rake: A garden rake is ideal for leveling soil, removing debris like leaves or grass clippings, and preparing beds for planting. Look for one with sturdy tines that can handle various gardening tasks.
- Garden Hoe: A garden hoe is invaluable when it comes to weeding and cultivating the soil. It helps break up the soil surface while removing unwanted vegetation.
- Watering Can or Hose: Proper watering is crucial for plant health. Depending on your preference and garden size, invest in a watering can with a narrow spout for precise watering or a hose with an adjustable nozzle to cover larger areas.
- Garden Gloves: Protect your hands from thorns, sharp edges, or harmful substances by wearing durable garden gloves. Look for gloves that fit well and provide good grip without sacrificing comfort.
- Wheelbarrow or Garden Cart: Moving heavy items like soil bags, mulch, or plants becomes much easier with a wheelbarrow or garden cart. It saves time and effort while reducing strain on your back.
- Garden Pruning Saw: For cutting thicker branches or pruning trees and shrubs, a garden pruning saw is essential. Choose one with a sharp blade and comfortable handle for efficient and safe use.
- Garden Kneeler or Knee Pads: Gardening often involves kneeling or working close to the ground. Protect your knees with a garden kneeler or knee pads to prevent discomfort and strain.
- Gardening Apron: Keep your tools and essentials within reach by wearing a gardening apron with multiple pockets. It helps you stay organized while working in the garden.
- Long-Handled Shovel: A long-handled shovel is handy for tasks like digging large holes, moving heavy soil, or transplanting larger plants. Look for one with a durable blade and a comfortable grip.
Remember, the quality of your tools matters too. Invest in sturdy, well-made tools that will last longer and make your gardening experience more enjoyable. With these essential garden tools at your disposal, you’ll be well-equipped to tackle various gardening tasks and nurture your plants to their fullest potential!
How do I choose the right type of soil amendments for my garden?
Choosing the right type of soil amendments for your garden depends on several factors, including the current condition of your soil, the specific needs of your plants, and your gardening goals. Here are some steps to help you make an informed decision:
Soil Testing: Start by conducting a soil test to determine its pH level and nutrient content. Soil testing kits are available at garden centers or through agricultural extension services. The results will provide valuable information about any deficiencies or imbalances in your soil.
Understand Your Plants’ Needs: Different plants have varying nutrient requirements. Research the specific needs of the plants you intend to grow in your garden. Some plants may prefer acidic soil, while others thrive in alkaline conditions. Knowing their preferences will guide you in selecting appropriate amendments.
Organic Matter: Adding organic matter is generally beneficial for most gardens as it improves soil structure, drainage, and fertility. Compost, well-rotted manure, leaf mold, and peat moss are common organic amendments that can enrich the soil with nutrients and beneficial microorganisms.
Nutrient-Specific Amendments: If your soil test indicates specific nutrient deficiencies or imbalances, choose amendments that address those needs. For example:
– Nitrogen (N): Blood meal, fish emulsion, or cottonseed meal can boost nitrogen levels.
– Phosphorus (P): Bone meal or rock phosphate can increase phosphorus content.
– Potassium (K): Wood ash or potassium sulfate can provide a potassium boost.
pH Adjustments: If your soil pH is too acidic (below 6) or too alkaline (above 7), you may need to adjust it using amendments such as lime (raises pH) or sulfur (lowers pH). Follow recommended application rates based on your soil test results.
Consider Soil Texture: Sandy soils drain quickly but may lack nutrients and moisture retention capacity. Clay soils tend to retain water but can become compacted. Amendments like perlite or vermiculite can improve drainage in heavy soils, while compost or peat moss can enhance water retention in sandy soils.
Follow Application Guidelines: Always follow the recommended application rates and guidelines provided by the manufacturer or based on your soil test results. Over-application of amendments can lead to imbalances or even harm your plants.
Environmental Considerations: Choose organic amendments whenever possible to promote sustainable gardening practices and minimize negative impacts on the environment. Organic amendments also improve soil health over time.
Consult Experts: If you’re unsure about which amendments to use, seek advice from local gardening experts, agricultural extension services, or master gardener programs. They can provide region-specific recommendations based on your garden’s unique characteristics.
Remember that soil improvement is an ongoing process, and it may take time to achieve desired results. Regularly monitor your soil’s condition and adjust your amendment strategy accordingly. With proper soil amendments, you’ll create an optimal growing environment for your plants and promote a thriving garden ecosystem.
What is the best way to water plants effectively and efficiently?
Watering plants effectively and efficiently is crucial for their overall health and growth. Here are some tips to help you water your plants in the best way possible:
- Water at the Right Time: Water your plants early in the morning or late in the evening when temperatures are cooler. This allows the water to penetrate the soil before it evaporates, reducing water loss.
- Water at the Base: Direct water at the base of the plant, near the root zone, rather than spraying it over the foliage. This ensures that water reaches where it’s needed most and minimizes evaporation.
- Deep Watering: Instead of shallow watering, aim for deep watering sessions. This encourages plants to develop deep roots, making them more resilient to drought conditions. Water until the soil is moist several inches below the surface.
- Use Mulch: Apply a layer of organic mulch around your plants to help retain moisture in the soil and reduce evaporation. Mulch also helps suppress weeds that compete for water resources.
- Consider Drip Irrigation or Soaker Hoses: These systems deliver water directly to plant roots with minimal waste through evaporation or runoff. Drip irrigation and soaker hoses are efficient methods that can save both time and water.
- Monitor Soil Moisture: Regularly check soil moisture levels before watering again. Stick your finger into the soil about an inch or two deep; if it feels dry, it’s time to water.
- Adjust Watering Frequency with Weather Conditions: Be mindful of weather conditions such as rainfall and humidity levels. Reduce watering during periods of rain or high humidity, as plants may not require as much additional moisture.
- Avoid Overwatering: Overwatering can lead to root rot and other plant diseases caused by excess moisture in the soil. Only provide enough water to keep plants healthy without saturating their roots.
- Use Proper Watering Techniques for Different Plant Types: Different plants have varying water requirements. Research the specific watering needs of your plants, taking into account factors such as their species, age, and environmental conditions.
- Collect and Reuse Rainwater: Consider installing a rain barrel or other water collection system to harvest rainwater. This is an eco-friendly way to provide water for your plants while reducing reliance on tap water.
Remember, it’s better to water deeply and less frequently than to water lightly and frequently. By following these guidelines, you can ensure that your plants receive the right amount of water while conserving this precious resource.
Which types of fertilizers should I use for different plants or gardening methods?
Choosing the right type of fertilizer for different plants or gardening methods is essential to provide them with the nutrients they need. Here are some common types of fertilizers and their recommended uses:
- All-Purpose Fertilizers: These fertilizers have a balanced ratio of nitrogen (N), phosphorus (P), and potassium (K), often referred to as NPK. They are suitable for a wide range of plants, including vegetables, flowers, and shrubs. All-purpose fertilizers can be applied during the growing season to promote overall plant growth and development.
- Organic Fertilizers: Organic fertilizers are derived from natural sources such as compost, manure, bone meal, fish emulsion, or seaweed extract. They release nutrients slowly and improve soil health over time. Organic fertilizers are ideal for organic gardening practices and can be used for various plants.
- Nitrogen-Rich Fertilizers: If your plants need a boost in leafy growth or if you have fast-growing vegetables like lettuce or spinach, consider using a nitrogen-rich fertilizer. These fertilizers have a higher proportion of nitrogen compared to phosphorus and potassium.
- Phosphorus-Rich Fertilizers: Phosphorus is crucial for promoting root development, flowering, and fruit production. Fertilizers with higher phosphorus content are beneficial for blooming plants such as roses or flowering bulbs like tulips or daffodils.
- Potassium-Rich Fertilizers: Potassium helps improve plant resilience against diseases and stress while enhancing fruit quality and overall plant vigor. Fruits, vegetables, and flowering plants can benefit from potassium-rich fertilizers.
- Slow-Release Fertilizers: Slow-release fertilizers provide a steady supply of nutrients over an extended period. They are convenient for gardeners who prefer less frequent applications but want consistent feeding for their plants.
- Liquid Fertilizers: Liquid fertilizers come in concentrated form and are mixed with water for application. They are quickly absorbed by plants and are suitable for both foliar feeding (spraying on leaves) and root application. Liquid fertilizers can be used for various plants, including container plants or those with specific nutrient deficiencies.
- Specialty Fertilizers: Some plants have specific nutrient requirements or prefer certain pH levels in the soil. For example, acid-loving plants like azaleas or blueberries may benefit from fertilizers formulated for acid-loving plants. Similarly, there are specialty fertilizers available for orchids, cacti, or bonsai trees.
Remember to follow the instructions provided on the fertilizer packaging regarding application rates and frequency. It’s also a good practice to conduct a soil test to determine any existing nutrient deficiencies or imbalances before selecting a fertilizer.
By understanding the nutritional needs of your plants and choosing the appropriate fertilizer accordingly, you can ensure healthy growth, vibrant blooms, and bountiful harvests in your garden.
How can I protect my plants from pests and diseases without using harmful chemicals?
Protecting your plants from pests and diseases without resorting to harmful chemicals is not only better for the environment but also promotes a healthier and more sustainable garden. Here are some effective methods to consider:
- Companion Planting: Utilize the power of companion planting by strategically placing certain plants together to repel pests or attract beneficial insects. For example, marigolds can deter aphids, while attracting pollinators like bees.
- Natural Predators: Encourage natural predators such as ladybugs, lacewings, and birds that feed on pests like aphids, caterpillars, and slugs. Creating habitats for these beneficial insects and birds in your garden will help keep pest populations in check.
- Physical Barriers: Use physical barriers like row covers or netting to protect plants from flying insects or larger pests like rabbits or deer. This method prevents direct contact between pests and your plants.
- Handpicking: Regularly inspect your plants for pests and remove them by hand. This method is particularly effective for larger insects like caterpillars or beetles that can be easily spotted and manually removed.
- Water Spray: A strong blast of water from a hose can dislodge small pests such as aphids, spider mites, or whiteflies from your plants’ foliage.
- Organic Pest Control Products: There are organic pest control products available that use natural ingredients like neem oil, insecticidal soap, or horticultural oils to target specific pests while minimizing harm to beneficial insects.
- Proper Plant Care: Maintain healthy plants through proper care practices such as watering adequately (avoid overwatering), providing sufficient sunlight, and avoiding overcrowding which can increase susceptibility to diseases.
- Crop Rotation: Rotate the location of your crops each year to disrupt pest life cycles and reduce the buildup of diseases in the soil.
- Mulching: Apply organic mulch around your plants to suppress weeds, regulate soil temperature, and prevent certain soil-borne diseases from splashing onto the foliage during rain or watering.
- Sanitation: Regularly remove dead plant debris, fallen leaves, or diseased plant material from your garden. This helps eliminate potential hiding places for pests and reduces the spread of diseases.
Remember that prevention is key when it comes to managing pests and diseases naturally. By maintaining a healthy garden ecosystem through diverse planting, good cultural practices, and regular monitoring, you can minimize the occurrence of problems and create a balanced environment where plants can thrive without relying on harmful chemicals.
What are the different types of plant supports available, and which ones should I use for specific plants?
Plant supports come in various forms, each designed to provide the necessary support and stability for different types of plants. Here are some common types of plant supports and their recommended uses:
- Stakes: Stakes are simple vertical supports made of wood, bamboo, or metal. They are commonly used for supporting tall, single-stemmed plants such as tomatoes or sunflowers. Stakes should be placed near the base of the plant and tied gently to prevent damage.
- Trellises: Trellises are frameworks with crisscrossed or parallel bars that provide support for climbing plants like cucumbers, beans, or vining flowers. They allow plants to grow vertically while maximizing space in the garden. Trellises can be made from wood, metal, or even recycled materials like wire mesh panels.
- Cages: Plant cages are typically used for supporting heavy-fruited plants like tomatoes or peppers. They consist of a framework made of metal wires arranged in a cylindrical shape. As the plant grows, it is contained within the cage, providing support and preventing sprawling.
- Tripods: Tripods are three-legged structures that provide support for tall-growing plants such as pole beans or certain types of flowers like delphiniums. They offer stability and prevent top-heavy plants from toppling over during strong winds.
- Pea Fences: Pea fences or netting are ideal for supporting climbing vegetables like peas or beans with delicate tendrils that need something to cling onto as they grow upwards. These fences can be easily attached to stakes or posts and allow plants to weave through them.
- Arbors and Pergolas: Arbors and pergolas serve both functional and decorative purposes in the garden. These larger structures provide support for climbing roses, wisteria, grapevines, or other vigorous climbers that require substantial structural support.
When choosing a plant support, consider the specific needs of your plants. Factors such as plant height, weight, and growth habit should be taken into account. It’s also important to consider the aesthetics of the support structure and how it will blend with your garden design.
Remember to install plant supports early in the growing season or at the time of planting to avoid damaging established plants. Regularly check and adjust the supports as the plants grow to ensure they are adequately supported.
By selecting the appropriate plant supports for your specific plants, you can help them grow upright, maximize space, prevent damage or breakage, and ultimately enhance the overall health and productivity of your garden.
When and how should I apply mulch in my garden?
Applying mulch to your garden is a beneficial practice that helps conserve moisture, suppress weeds, regulate soil temperature, and improve overall plant health. The timing and method of applying mulch may vary depending on your specific garden and region, but here are some general guidelines to follow:
Timing:
Spring: Apply mulch after the soil has warmed up in spring. This helps retain soil moisture as temperatures rise and reduces weed growth.
Fall: Mulching in the fall can help insulate plant roots during winter, prevent soil erosion, and provide a protective layer against extreme temperature fluctuations.
Method:
Prepare the area: Before applying mulch, remove any existing weeds or grass from the area. It’s also a good idea to water the soil thoroughly if it’s dry.
Choose the right mulch: Select an appropriate type of organic or inorganic mulch based on your plants’ needs and preferences. Common organic options include wood chips, straw, shredded leaves, compost, or bark chips.
Apply a layer of mulch: Spread a layer of mulch around your plants, keeping it about 2-4 inches thick. Be careful not to pile it up against plant stems or tree trunks as this can encourage rotting or disease.
Maintain a gap around plants: Leave a small gap around the base of each plant to allow air circulation and prevent moisture buildup that could lead to root rot.
Replenish as needed: Over time, organic mulches break down and decompose. Replenish the mulch layer annually or as needed to maintain its thickness.
Additional tips:
– Avoid using thick layers of fine-textured mulches that may compact and prevent water penetration.
– Consider using landscape fabric or cardboard as an additional weed barrier before applying mulch for extra weed suppression.
– Water the soil before applying mulch if it’s dry; this will help conserve moisture and prevent the mulch from drawing water away from plant roots.
– Regularly monitor the mulch layer for any signs of mold, fungus, or pests. Remove and replace any affected areas as necessary.
Remember, mulching is not a one-time task. It’s an ongoing process that requires periodic maintenance to ensure its effectiveness. By applying mulch correctly and at the right time, you can create a healthier and more vibrant garden environment.
What are some tips for starting seeds indoors successfully?
Starting seeds indoors can be a rewarding and cost-effective way to jumpstart your garden. Here are some tips for successfully starting seeds indoors:
- Choose the right containers: Use seed trays, pots, or biodegradable peat pots with drainage holes to provide adequate space for root development. Ensure they are clean and sterilized before use to prevent the spread of diseases.
- Use quality seed-starting mix: Avoid using regular garden soil, as it may contain pests or diseases. Opt for a sterile seed-starting mix that provides good drainage and moisture retention.
- Sow seeds at the proper depth: Follow the instructions on the seed packet for the recommended planting depth. As a general rule, smaller seeds should be sown shallowly, while larger seeds can be planted deeper.
- Provide adequate light: Place your seed trays near a south-facing window where they can receive at least 6-8 hours of direct sunlight daily. If natural light is insufficient, use fluorescent grow lights positioned 2-4 inches above the seedlings to ensure healthy growth.
- Maintain proper temperature and humidity: Most seeds germinate best at temperatures between 65-75°F (18-24°C). Use a heating mat if necessary to maintain consistent warmth. Covering the trays with plastic wrap or using a humidity dome helps retain moisture until germination occurs.
- Water carefully: Keep the soil evenly moist but not waterlogged, as excess moisture can lead to fungal diseases or damping off. Use a spray bottle or watering can with a fine nozzle to avoid displacing small seeds or causing damage.
- Provide air circulation: Good airflow helps prevent mold and fungal issues in seedlings. Use a small fan on low setting nearby or gently brush your hand over the seedlings daily to simulate natural breezes.
- Thin out overcrowded seedlings: Once your seedlings have developed their first set of true leaves, thin them out by removing weaker or overcrowded seedlings. This allows the remaining plants to have enough space and resources for healthy growth.
- Harden off before transplanting: About a week before transplanting seedlings outdoors, gradually expose them to outdoor conditions. Start with a few hours of direct sunlight or wind each day, gradually increasing the duration over several days.
- Transplant carefully: When it’s time to transplant your seedlings into larger containers or the garden, handle them gently by their leaves or root ball to avoid damaging delicate stems. Plant them at the same depth as they were in their seed trays.
Remember to label your trays or pots with the plant variety and date of sowing for easy identification later on. With patience, care, and attention to these tips, you can enjoy healthy and robust seedlings ready for successful transplantation into your garden.
How can I properly store and organize my garden supplies to keep them in good condition?
Proper storage and organization of garden supplies are essential to keep them in good condition and readily accessible when needed. Here are some tips to help you maintain the longevity of your tools and keep everything organized:
- Clean and Dry: Before storing your tools, make sure to clean them thoroughly. Remove any dirt, debris, or plant residue using a brush or hose. Dry them completely to prevent rust or corrosion.
- Sharpen and Oil: If applicable, sharpen the blades of your pruning tools before storing them. Applying a thin coat of oil on metal parts can help prevent rusting.
- Separate by Type: Categorize your garden supplies based on their type (e.g., hand tools, pruning tools, watering equipment) and group them together. This makes it easier to find what you need when working in the garden.
- Utilize Storage Containers: Invest in durable storage containers or toolboxes that can accommodate different sizes of tools and equipment. Opt for ones with compartments or dividers to keep items separate and prevent damage from banging against each other.
- Hang Larger Tools: For larger tools like rakes, shovels, or hoes, consider hanging them on a wall using hooks or pegboards. This not only saves space but also keeps them easily accessible.
- Label Containers: Labeling your storage containers can save time when searching for specific items. Use waterproof labels or markers to clearly identify the contents of each container.
- Store in a Dry Location: Choose a cool, dry location for storing your garden supplies to avoid moisture buildup that can lead to rust or mold growth. A shed, garage, or dedicated storage area is ideal.
- Protect from Extreme Temperatures: Extreme heat or cold can damage certain gardening materials such as hoses or chemicals. Ensure that sensitive items are stored away from extreme temperature fluctuations.
- Hang Garden Gloves: Hang your gardening gloves near the entrance of your storage area or shed for easy access. This way, you won’t forget to put them on before starting any gardening tasks.
- Regular Maintenance: Periodically check your stored supplies for any signs of damage or wear. Replace or repair damaged items promptly to prevent further deterioration.
By following these storage and organization tips, you can keep your garden supplies in good condition, extend their lifespan, and have a well-organized space that makes gardening more enjoyable and efficient.