
Landscape Borders: A Practical Guide to Defining Your Garden
Landscape borders create a clean transition between areas of a yard, such as a lawn and flower bed, a patio and planting area, or a path and groundcover. A well-chosen border can make a landscape look more finished, help keep materials in place, and make routine maintenance easier. The best option depends on your garden’s style, budget, site conditions, and the amount of upkeep you’re willing to do.
Why Add a Landscape Border?
Borders can serve both practical and visual purposes. They can:
- Define the edges of lawns, beds, walkways, and other landscape areas
- Help prevent lawn grass from spreading into planting beds
- Keep mulch, gravel, or soil from spilling onto paths and lawns
- Make mowing and trimming easier by creating a distinct edge
- Add structure, contrast, and visual interest to a garden
A border is not a substitute for good planting or soil preparation, but it can make a landscape easier to manage and help it look intentional.
Common Types of Landscape Borders
Natural Edges
A simple trench or spade-cut edge can define a bed without introducing another material. Natural edges work well in informal gardens and are relatively inexpensive to create. They usually need to be refreshed periodically as grass grows back or soil shifts.
Plastic or Composite Edging
Flexible plastic edging is often used to separate lawn from beds or to create curves. It is generally lightweight and easy to install. Higher-quality composite products may be more durable, but all flexible edging should be installed securely and at an appropriate depth to reduce movement and prevent grass from growing beneath it.
Metal Edging
Steel or aluminum edging offers a slim, understated line and can work well in both modern and traditional landscapes. Metal can form gentle curves or straight edges, depending on the product. Choose an appropriate material and finish for your climate, and handle installation carefully because edges may be sharp.
Stone and Brick
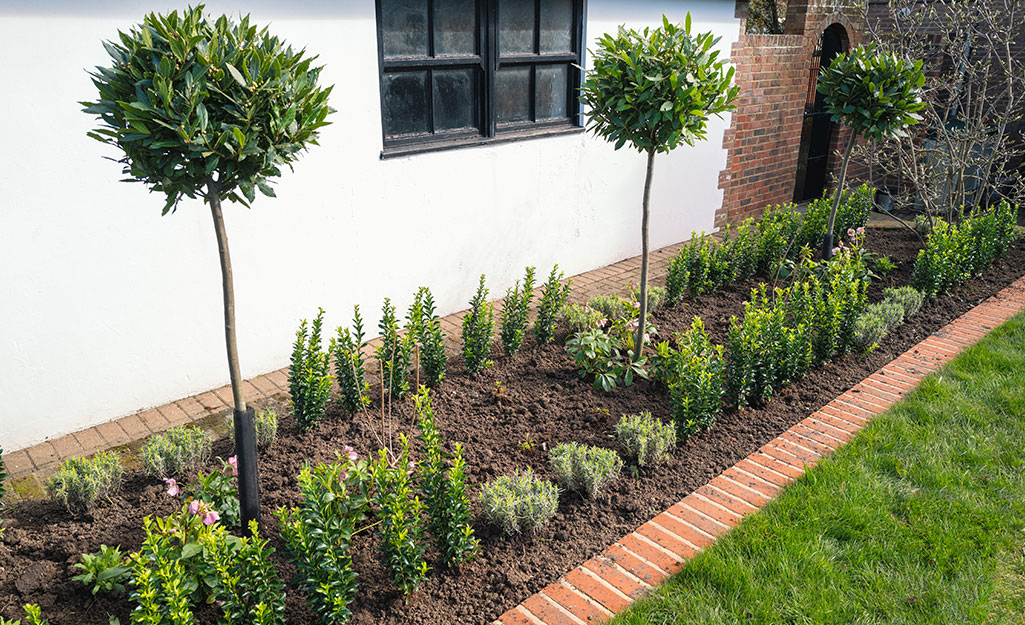
Stone and brick provide a substantial, classic border. They can be arranged in straight lines, curves, or low walls, and are available in many colors and textures. These materials typically cost more and may take more effort to install, especially if a stable base is needed. Loose-laid pieces can shift over time if the ground is uneven or poorly prepared.
Concrete
Concrete edging can create a durable, permanent boundary. It may be poured in place or installed as precast units. Because it is difficult to move once installed, plan the layout carefully before construction. Concrete is a good choice where a crisp, long-lasting edge is a priority.
Plants as Borders
Low-growing perennials, ornamental grasses, shrubs, or groundcovers can create a soft, living edge. Plant borders add color and habitat, but they require room to grow and may need pruning or division. Choose plants suited to the site’s light, soil, and moisture conditions, and avoid species known to spread aggressively in your area.
How to Choose the Right Border
Start by considering the purpose of the border. A narrow edge between lawn and flower bed has different needs from a raised border beside a walkway. Then consider these factors:
- Style: Match the border’s color, texture, and form to the house and surrounding landscape.
- Durability: Consider exposure to weather, foot traffic, lawn equipment, and soil movement.
- Maintenance: Some borders need occasional resetting, trimming, or re-cutting.
- Cost: Compare the price of materials with installation time and long-term upkeep.
- Drainage: Make sure the border will not block water or direct it toward buildings.
- Safety: Avoid sharp edges or raised features that could create trip hazards near paths and play areas.
Planning and Installing a Border
Before digging, mark the proposed line with a garden hose, rope, or marking paint. View the layout from different parts of the yard and adjust it until the curves and proportions look right. Broad, sweeping curves often feel more natural than a series of tight bends.
Call 811 before digging in the United States to have underground utility lines marked. Also check local requirements if the project involves a retaining wall, drainage changes, or work near a property line.
For many edging materials, installation begins by removing grass and debris along the planned line. Prepare a level, stable base when the product calls for one, and follow the manufacturer’s instructions for depth, fasteners, and joining sections. Set the top of the border at a height that suits its purpose without creating a tripping hazard or interfering with mowing.
After installation, add soil or mulch carefully. Keep mulch away from tree trunks and plant stems, and avoid piling soil against siding or other structures. Water should continue to drain away from the home.
Design Tips for a Cohesive Look
- Use one or two border materials throughout the yard rather than introducing too many competing finishes.
- Repeat colors or textures found in nearby paving, walls, or the house exterior.
- Use a stronger, more formal border for geometric beds and a softer edge for naturalistic plantings.
- Consider how the border will look in winter, when flowers and foliage are less prominent.
- Make sure the border is easy to reach for mowing, weeding, and other routine care.
Keeping Landscape Borders in Good Shape
Inspect borders each spring and after periods of heavy rain or freezing and thawing. Reset loose pavers, replace damaged sections, and clear away soil or mulch that has covered the edge. Re-cut natural edges as needed, and prune plant borders before they crowd paths or neighboring plants.
A thoughtfully designed landscape border can bring order to a garden while supporting its overall style. By choosing a material that suits the site and installing it with drainage, safety, and maintenance in mind, you can create an edge that looks good and works well for years.
7 Essential Tips for Choosing and Installing Landscape Borders
- Choose edging that complements your home and garden style.
- Use durable materials suited to your climate.
- Keep borders low enough to avoid blocking plants.
- Install edging deep enough to limit grass spread.
- Create smooth curves for a natural look.
- Leave room for mowing and maintenance.
- Check drainage before setting borders.
Choose edging that complements your home and garden style.
Choose landscape edging that complements the style of your home and garden so the border feels like a natural part of the overall design. Brick or stone can suit a traditional home, while simple metal edging often pairs well with a modern landscape. For a relaxed, natural garden, consider a soft spade-cut edge or low-growing plants. Coordinate colors and textures with nearby features, such as your home’s exterior, patio, or walkway, to create a cohesive look.
Use durable materials suited to your climate.
Choose border materials that can withstand your local weather and soil conditions. In areas with freeze-thaw cycles, sturdy stone, brick, or flexible edging designed for cold climates may hold up better than materials prone to cracking or shifting. In hot, sunny regions, select products that resist fading, warping, and heat damage. Considering climate before installation can help your landscape border stay attractive, stable, and low-maintenance for years.
Keep borders low enough to avoid blocking plants.
Keep landscape borders low enough to let nearby plants remain visible and receive the sunlight and airflow they need. A border that rises too high can hide flowers and foliage, make a planting bed feel crowded, or cast unwanted shade on shorter plants. Before installing edging, consider the mature height of the plants and view the border from different parts of the yard. Choose a low-profile material or set taller edging slightly below the soil line so it defines the bed without overwhelming the planting.
Install edging deep enough to limit grass spread.
Install landscape edging deep enough to help keep grass from spreading into garden beds. Many grasses spread through underground stems or roots, so shallow edging may not stop them from crossing the boundary. Follow the manufacturer’s installation guidance, and leave only the amount of edging visible above ground needed to define the bed. Check the edge periodically for gaps or grass growing underneath, and trim or remove any runners that get through.
Create smooth curves for a natural look.
Smooth, sweeping curves give landscape borders a relaxed, natural look and help beds blend into the surrounding yard. Before digging, lay out the curve with a garden hose or rope, then step back and view it from several angles. Aim for broad, flowing lines rather than tight bends or uneven wiggles, which can look busy and make mowing or edging more difficult.
Leave room for mowing and maintenance.
Leave enough space along landscape borders for mowing, trimming, and other routine care. A narrow strip of pavement, mulch, or low groundcover between the lawn and planting bed can make it easier to mow without damaging plants or edging. Keep borders clear of obstacles, and choose an edge height and shape that won’t catch mower wheels or create a tripping hazard. Planning for maintenance from the start helps keep the garden neat and makes regular yard work simpler.
Check drainage before setting borders.
Before installing a landscape border, check how water moves through the area after rain or watering. A border that blocks or redirects runoff can leave plants waterlogged, cause soil erosion, or send water toward your home or a neighbor’s property. If the ground stays soggy, consider a design or material that allows drainage, and make sure the finished border follows the site’s natural slope rather than creating a dam.